Have you ever tried to flatten an aluminium tube in a vice? It is stronger than expected. I even damaged the vice a bit with this action. Then I made a model in FreeCAD and create a nonlinear simulation in PrePoMax (CalculiX). The “nonlinearity” is defined in all three ways:
- Nonlinear Material (Plastic)
- Nonlinear Geometry (Nlgeom)
- Contact (Surface to surface)
Firstly, I wanted to estimate the required pressing force to close the tube completely. And then I would also like to reduce the springback after the flattening process.
I made a tube with 18 mm outer diameter and 1.5 mm wall thickness. So we have to move the upper steel plate 15 mm downwards to close the inner diameter of the tube (red arrow in the image below).
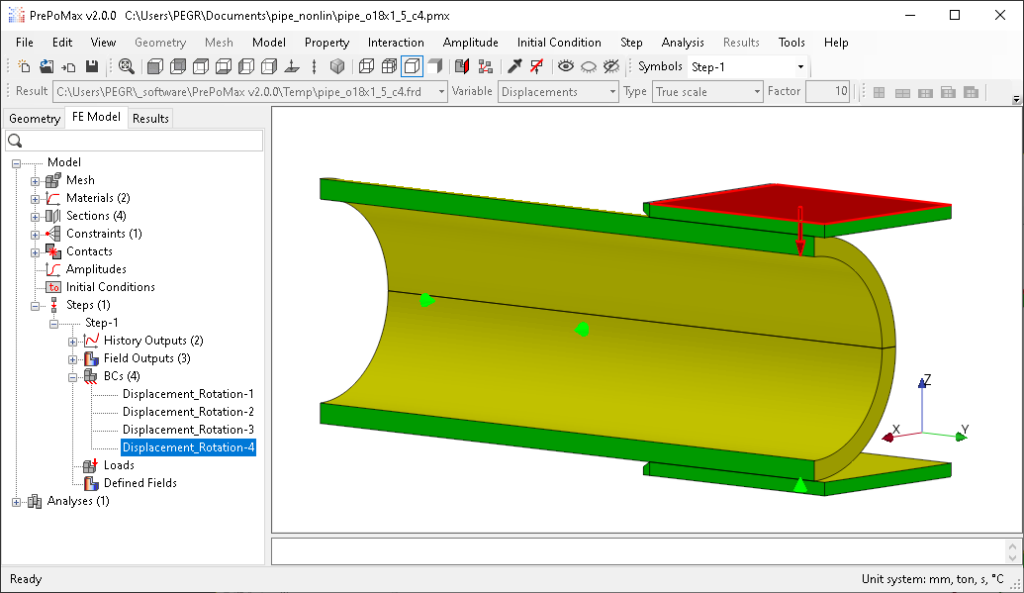
If you need more information about the contact then I can recommend the post about the bicycle chain, I use the same approach here, but now with µ = 0.08 (frictional contact ).
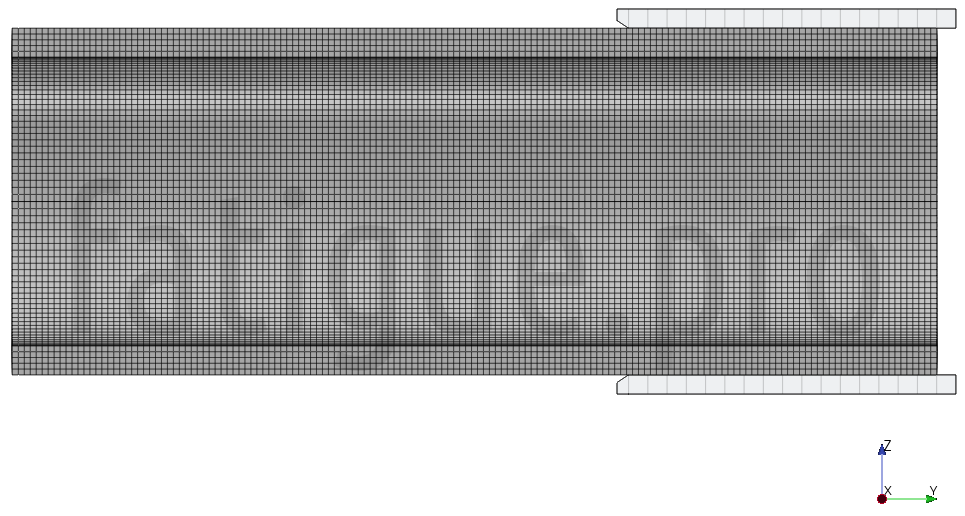
Thanks to the new implemented Gmsh option in PrePoMax version 2.0.0 it is easy to create a full Hex mesh with 63426 nodes and 50328 elements. I used element type C3D8 without mid nodes, because I am not really interested in stress and strain results and to get a faster solution. Following Image shows the fine mesh of the tube (grey) and the coarse mesh of the steel plates (light grey).
CalculiX is doing a great job here. The first step of 14.9 mm is solved with 100 load increments.
The animated side view and top view of the half model looks also interesting. Nice to see the fine mesh sliding along the steel plate.
So we can check the displacement in Z direction.
Now we should also take a closer look at the contact results. I always check the contact penetration (COPEN), because if the values are too large then the contact stiffness must be increased. The value is mostly below 0.01 mm during the flattening process. At the end of the process we see higher values on the sharp edge of the steel plate, but still below 0.025 mm.
Next figure shows the contact pressure (CPRESS) and we see high values on the edge of the steel plate. In that area is the mesh to coarse to get useful results. But below the flat plate we are still lower than 270 MPa, because here is the mesh good enough.
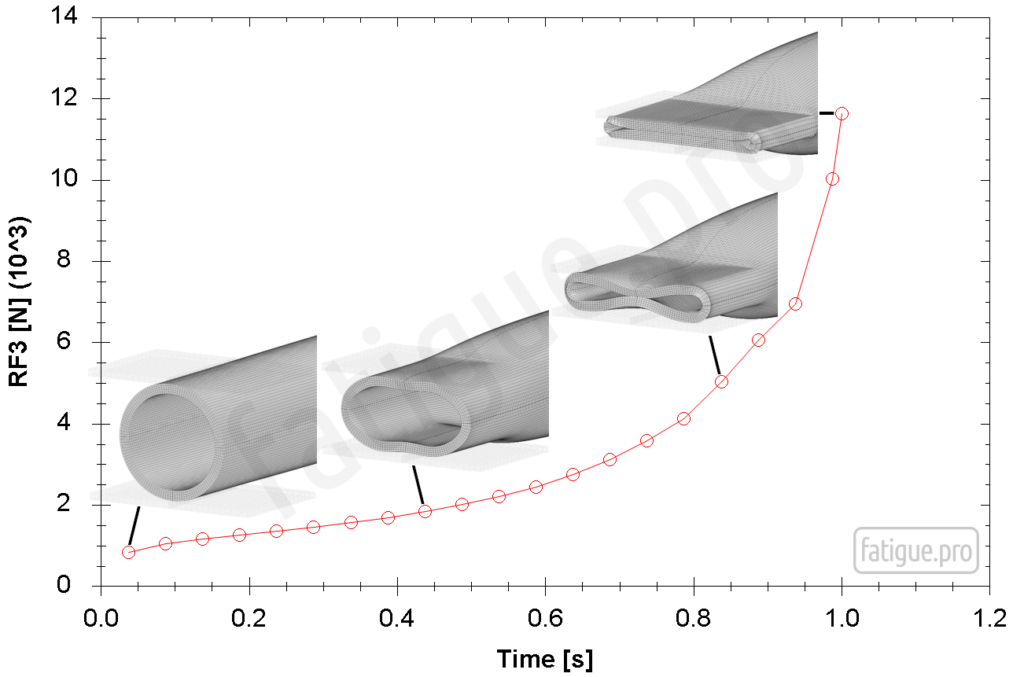
In PrePoMax we can also check the required pressing force. I got 11.6 kN at the closed half tube. So we need already 2.6 ton of pressure force to close the full tube in that setup.
I used FreeCAD to create the geometry, PrePoMax to pre and post process the model and solved the model with the in PrePoMax integrated CalculiX solver.
I am still impressed, I did not expect so smooth results and so many possibilities when I use free available opensource software.