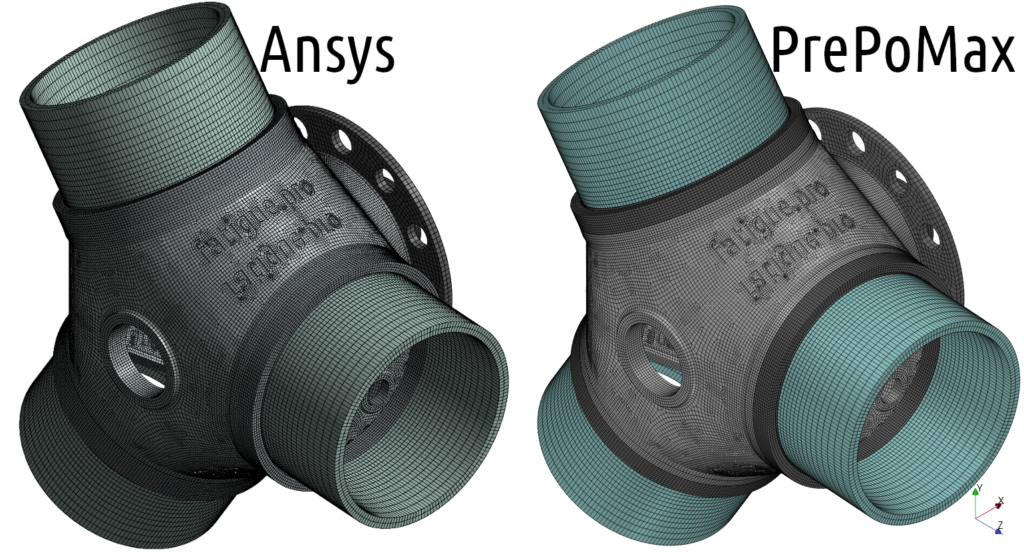
Now I reused the full Hexaeder mesh (Hex20 & Wedge15 only) from Ansys in PrePoMax to make some comparisons. In my post “Wind turbine hub calculation in Ansys” you find more information of the mesh created in Ansys. And in my post “Wind turbine hub calculation in PrePoMax” you find all the information about the model setup in PrePoMax. A lot has improved over the last ten months, and the exploded view can now also be used with this more complex hub model.

Two month ago I prepared a simulation of a Wind turbine hub calculation in Ansys. And I would like to calculate the Ansys mesh in PrePoMax to compare the results. So I translated the mesh from Ansys (mesh export as nastran.bdf) to a PrePoMax compatible mesh with the great Gmsh tool. The mesh is imported as first order (corner nodes only) mesh in Gmsh, so we have to add middle nodes with “Set order 2” to get C3D20 hex elements in PrePoMax.

The exported mesh from Gmsh can be imported in a new model in PrePoMax. If you need more information about that process, you can also check my post “I went into the mesh“.
As I mentioned above the setup of the model is fully described in my post “Wind turbine hub calculation in PrePoMax“. For the following result plots I defined 10 load steps to simulate a rotation of 120° instead of only 6 load steps in the previous calculation.
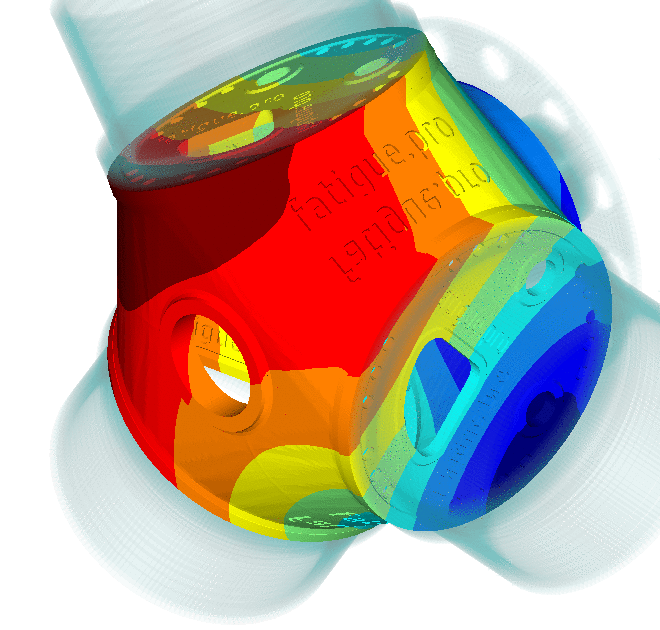
So we can jump direct to the result comparison and the results are looking unbelievable close. You might think that I also imported the result plots from Ansys, but the PrePoMax results are calculated with Calculix.

In my post “Wind turbine hub calculation in Ansys” you find the same results calculated with completely different meshes. And the deviations there were significantly higher than here.
But let’s also check the detail plots. Here you can find some deviations next to the tie contact. Because the tie contact sew nodes and the bonded contact glue faces. And the mid nodes in PrePoMax are on a straight line between the corner nodes, because of the mesh translation via Gmsh.

I still found no way to rotate the model around the X axis with precise angle values in PrePoMax. So I used in the past ParaView (see Wind turbine hub calculation in PrePoMax). But now I prepared a new animation with the CalculiX graphical interface (CalculiX GraphiX: cgx).

I am still impressed, I did not expect such good results and so many possibilities when I use free available opensource software.
Give PrePoMax a try and if you like you can load this wind turbine hub example from the wtg hub pmx file (33 MB).